Figurative Artist Handbook: Modeling the Form – Part One
Drawing New York is thrilled to partner with artist Rob Zeller, author of The Figurative Artist’s Handbook to offer our members a ‘serialized digest’ of his extremely popular and beautiful book. Each week we will bring you new topics and techniques relating to figure drawing so check back often.
THE ESSENTIALS OF SHADOW AND LIGHT IN CREATING FORM
Human beings can see literally millions of subtle value shifts with the naked eye. But, as artists, we are limited in how much we can execute that range with our pencils and brushes. This means, to model form effectively, we need to simplify the range of values that we can see. In other words, we try to create something parallel, something that contains the essence of what we see. I think numbered value systems are kind of silly, on the face of it. They can in no way approximate that incredible range of values, but they can come close to the truth in another way: Through simplification, they help us create believable surface form.
To do that, the artist divides light from shadow. There is nothing in the middle. Either the light source is hitting the form we are drawing on the model or it isn’t. Where it isn’t, that part lies in shadow. Everything else is simply a gradation of light. There are no halftones in a classical conception of form. Nothing can be half in light and half in shadow. If it’s not dark enough to be shadow, then it’s simply a very dark light
Click Here to Order The Figurative Artist’s Handbook
For simplicity’s sake, I use an 8-value scale. While some tout 10- or even 11-value scales, I do not think it’s worth quibbling over the merits of various systems. They are all an artifice. Reality is more complicated.
The Shadow Range
The shadow range is divided into three values: cast shadow and accents, shadow, and reflected light. It is important to keep your shadows flat and compressed in a classical conception of form.
- Cast shadow and accents (1): These are the darkest values. They represent the most complete absence of light we usually encounter in a studio setting.
- Shadow (2): Next on the value scale is the general shadow, which is just a touch lighter than the cast shadow. No matter how dark the shadow is, there will always be a touch of light in it, due to atmospheric reflections—unless you are in outer space, of course.
- Reflected light (3): This is the most misunderstood value on the entire scale. It happens when light is reflected by some adjacent light source, causing it to bounce into the shadow. No light from the light source is hitting that area of the form directly. If it were, it would be in the light. Thus, it’s indirectly lit and still within the shadow range. Please remember: The reflected light must always be darker than any of your light values. The value shift from shadow to reflected light is subtle. Do not let it encroach into the light range.
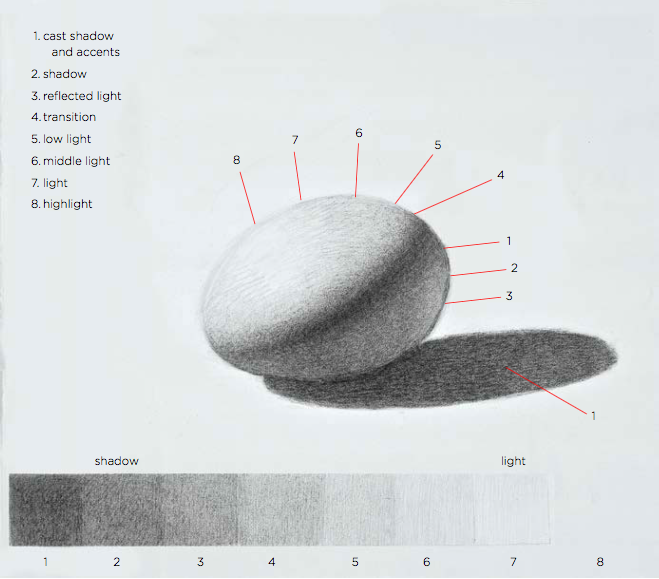
The Light Range As mentioned earlier, in traditional drawing and painting, all of the really engaging activity takes place in the light range. To say that there are five values to represent the light is something of a bad joke. In truth, an infinite range of values can be found in the light, but for the purposes of teaching the concept of form, I break things down into five values.
- Transition (4): This very darkest light value can fool you. It’s so close to the shadow that you may think it is actually part of the shadow. But, in reality, it’s the very first step in the light direction. This value is likely the one that confuses artists into using the term halftone. I think it is best to avoid that term, as it doesn’t really say anything. Any given value is either light or shadow.
- Low light (5) and middle light (6): These two values are incredibly close to each other in appearance. Depending on the amount of time you have to work on your drawing, you may want to further subdivide them to create even more values in the light range. Alternatively, if you have limited time to work, you might combine them into a single value.
- Light (7): This is the greatest area of mass, the part of the form that is directly in the light. If you have a strong light source, you should have a strong, clear light mass on the figure. And vice versa. A weak light source means a weak light mass, full of low and middle lights. Keep your light source strong and keep your light area clean. Don’t overwork it.
- Highlight (8): The brightest of the light values, this is another tricky concept. It can be created by employing the white of the paper, or if you’re working on a toned surface, by adding a white medium. A highlight is actually more of an “event” than a value. The location of the highlight will shift with the position of the artist. It does not really exist on the model. It is simply a refraction of the light source, at its most intense, based on the surface texture of the model. Usually highlights happen as a result of a light source hitting a hard surface. As such, you will find lots of them on glass or metal, whereas skin is a soft, nonreflective surface, with few highlights.
Click Here to Order The Figurative Artist’s Handbook
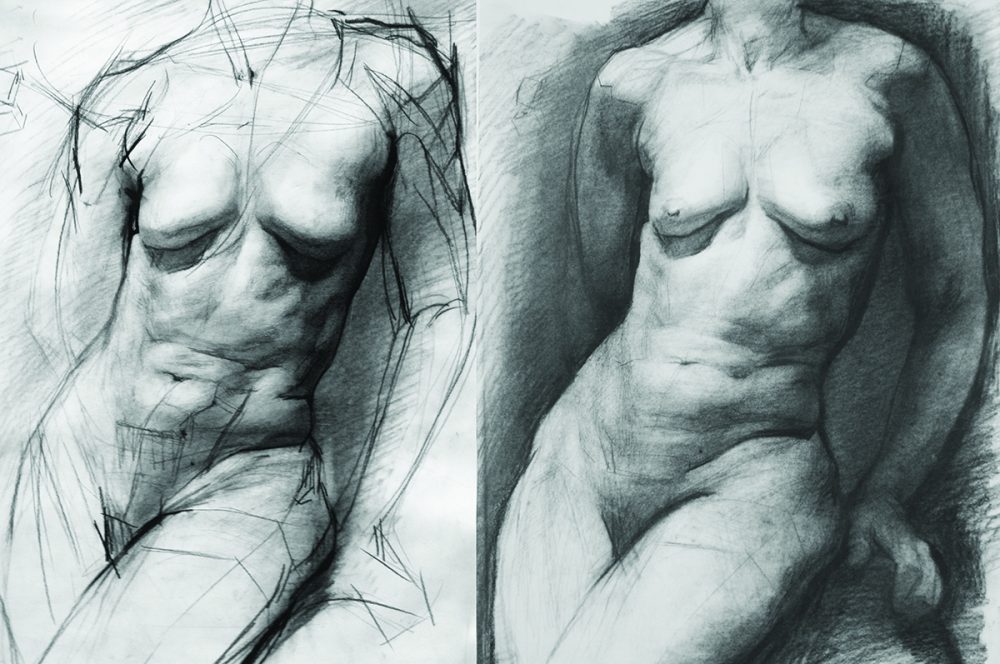
Top Left: This workshop demonstration drawing by Steven Assael shows the early stages of his process. Note the areas where the planar conception will (ultimately) evolve into anatomical and surface morphology.
Responses